So as everyone already know now with 2016 PowerShell is the way to go for all Project Server related deployment operations, below is the step by step guide to install & deploy Project Server 2016, assuming you all know how to deploy SharePoint 2016, refer to install details here (https://technet.microsoft.com/en-us/library/ff608031(v=office.16).aspx)
For the below installation I am using a single server VM in a Hyper-V environment
- Hardware
- 10GB RAM
- 4 virtual proc assigned
- 120 GB Disk space
- Software
- Windows Server 2012 Enterprise with latest SP
- SQL Server 2014 SP1
- SharePoint Server 2016 Beta2 (only because I wanted to upgrade to RC)
- Domain Controller
- Visual Studio 2015 Community edition (Optional)
- Assumptions
- You already have managed account set up
- Project Server Application proxy has been setup
- Managed Path has been setup
As you can see unlike 2013 now you cannot PWA (Project Web Access) creation menus are not available, hence we will use a combination of PowerShell & GUI interface to deploy the Project Server though everything performed via GUI can also be done with PowerShell however it’s just my personal preference to use a combination

Step 1: Make sure you have Project Server License enabled, in my case I have already activate the project server license key, to get a key for Beta refer here
“When you create a Project Server site on SharePoint Server 2016 Release Candidate, you need a Project Server 180-day trial key. If you attempt to enable the Project site, the following error appears: “The farm does not have a product key for Project Server. You can add your key by using Enable-ProjectServerLicense.
Use the following 180-day trial key for Project Server:
Y2WC2-K7NFX-KWCVC-T4Q8P-4RG9W

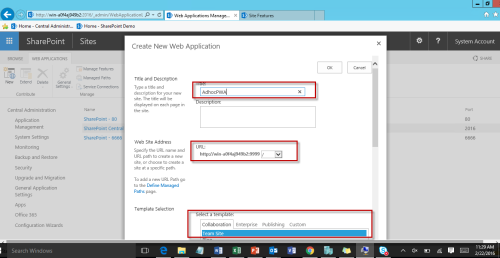
Step 2: Create a Web Application
In this case, I chose to use GUI to create a new Web App which will host the PWA site collection

Step 4: Create a root site collection
Error in my trial and error thing I had created a root site collection from the UI, however was again trying to do it from the PowerShell, you can use either to do so, in my case I deleted the one I created earlier using GUI and created new one with PowerShell

Step 5: to create PWA site collection use the command below
New-SPSite -ContentDatabase -OwnerAlias -Name "Project Web App Demo" -Template "pwa#0"
Important is to use the required template else you will have to activate the PWA features later 😉

Fairly straight forward, isn’t it ? you get your new PWA provisioned

Last thing though optional I wanted to get my permission mode changed to Project Server instead of SharePoint
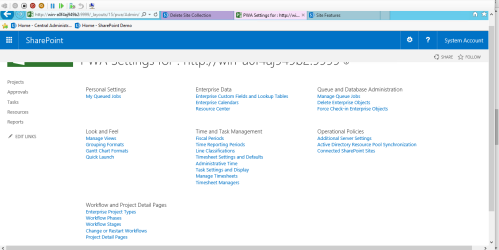
Set-SPProjectPermissionMode -Url -Mode ProjectServer


